How to Crate a table
Keep an eye out for this young ‘fella rummaging through your skip during the night. He’s known for that!
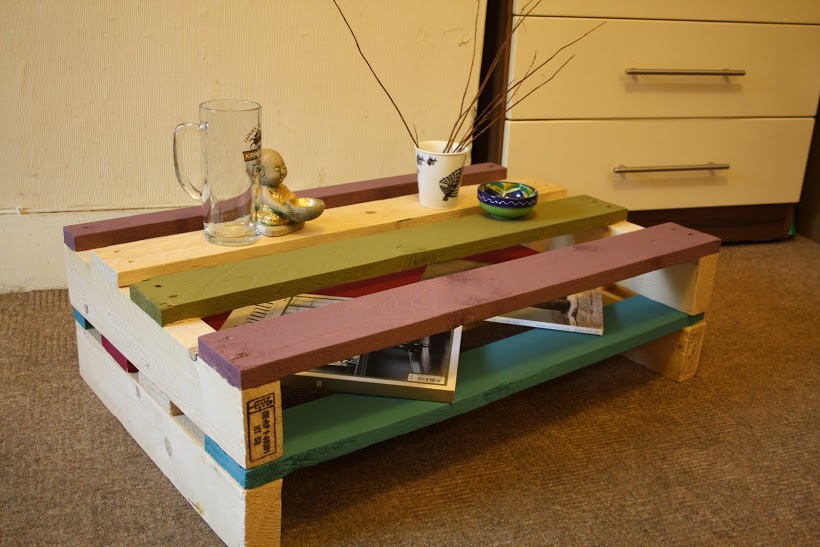
For this Project I decided to give new life to a few crates I found in work. We get quite a lot of deliveries and most of the smaller crates get recycled not so much reused; so I had an idea, take them home and give them some purpose.
On the way home I stopped off in my local Homebase and grabbed some supplies. Sandpaper – I got the coarse grain as the wood was very rough, it would make my job easier to get it to a smooth finish.


Paint – I chose a few different colours that attracted my eye and that I thought would go well and complement each other.
Paint brushes – a few different sizes are good to have if you have larger or smaller pieces of wood to paint over and finally tape which you’ll see why further down.

First start by sanding the wood down do this outside and wear protective eye wear we don’t want you getting splinters in your eye balls. You are going to try and get it nice and smooth so when you touch it you don’t get any unwanted jabs in your hands – wear gloves if you like when sanding as it will lower the chances of splinters until you are done. What I do and find it handy when sanding is wrap the paper around something square or rectangle as it will give you more grip making it easier to sand.
When you think you have it nicely sanded down lets paint. The way I decided to paint mine was take four colours and paint two on one crate and two on the other. Before you start painting put down your tape around where you don’t want paint, this will help you get nice straight lines and not have paint drips everywhere unless that’s what you want. Now grab you paint and start; these paints I got were nice and cheap. They are small tester pots but you get loads in them especially if you’re doing a small painting job like this.

Now the boring part; watching paint dry! This is where I go hunting for ideas of where to place and what I’m going to decorate with. Because I only used two crates it has ended up quite close to the floor I thought about giving it some sort of height maybe using bricks or books. But then the idea of an Asian style theme came to mind. Make sure you keep a window open or a door to let the air in around it, just to help the wood dry out nice and evenly.


After a few hours when you’re confident it’s dry and ready start peeling off the tape and build. Take the few bits and bobs you have found and decorate, it also has a nifty shelf underneath. And there you have it a new table to enjoy.

Words & Photography: Ché Fegan